Turn Those Adult Coloring Book Pages Into These 5 Gorgeous Greeting Cards!
Posted by ColorIt Support on
Everybody and their aunt Muriel knows that adult coloring books are great for relaxation, stress relief, and mental wellness. Doing adult coloring book pages can help take your mind off your worries, even for a bit. The question is, what do you do with those adult coloring book pages after you’ve colored them?
Should you frame them?
Stick them to the honorary spot on your fridge for a couple of weeks?
Or do your precious coloring book pages just end up gathering dust on the shelf after you’ve colored them?
Don’t let your coloring books go to waste! Instead of letting your masterpieces sit on a corner, why don’t you turn those coloring book pages into gorgeous handmade greeting cards?
Handmade Is Still In!
It might be so easy to send an email or a text message these days, but you can’t deny the fact that handmade cards are just another level of thoughtfulness altogether.
See, giving someone a special, hand-crafted card (or hand-crafted anything, for that matter!) tells them that you were thinking of them the whole time. It lets the person know that you simply didn’t drop by the dollar store to get them something generic. Instead, it shows that you channeled your creativity and spent precious time and energy in making something especially for them.
Handmade greeting cards are unique, too. No two cards are made the exact same way. Unlike store-bought cards, handmade ones allow you to add a personal touch. You can customize it however you like. Your creativity is the limit!
What Are The Benefits of Going DIY?

Aside from spreading good vibes, the great thing about going DIY, in general, is that it has a ton of benefits for you, too!
Here are some of them:
Doing DIY projects stimulates your brain and gets those creative juices flowing.
Hand-made designs, DIY and paper crafting introduce fun little challenges that help you develop new skills. This doesn’t only apply to greeting cards, either. You can also learn a myriad of new skills like painting, coloring, scrapbooking, knitting, making dream catchers, origami and the like! If you're bored, uninspired or in a slump, try taking on a project or two to get your creative groove back on. It works all the time!
It makes you appreciate things more
Going DIY can make you realize how much time and effort goes into making something. It gives you a deeper connection to the things around you and makes you appreciate their value even more.
It makes for great bonding moments with friends and family
Doing arts and crafts is always a good idea! Spend a nice afternoon with your kids or loved ones making projects and you'll see that you aren't just creating something; you're also making great memories.

It's an awesome opportunity to make new friends
Like the coloring community, the craft and DIY world is also full of supportive and friendly individuals. Take this opportunity to meet new people and be part of a group. Here, you can celebrate wins, encourage each other, share tips and even organize events.
You can save money---- and the environment
Taking on DIY projects can save you a lot of money in the long run. If you know how to make things, you don’t have to spend a fortune to buy or repair something. It’s also good for the environment. Lots of DIY projects use upcycled materials so you’re not only saving money; you’re also keeping trash out of the landfills.
You can eventually earn from it, too!
DIY and crafts are a great way to earn some cash on the side. The demand for handmade items is growing, probably because people also want to take a break from our fast-paced lifestyles. Grab this chance to turn your hobby into a side-hustle. Who knows? You might be able to turn it into a full-blown business someday.
How To Make Handmade Greeting Cards Using ColorIt Art Materials and Adult Coloring Book Pages
Making greeting cards is one of the easiest ways to jumpstart your DIY and crafting hobby. The best part is that you can decorate with coloring books and give your coloring pages new life by using them in this project.
Here are 5 gorgeous greeting card ideas that you can make using your adult coloring book pages:
Happy Holidays Greeting Card

Everybody can use a bit of holiday cheer! You can make this gorgeous holiday greeting card featuring Christmas mainstays. All you need is a coloring page and some materials that you can easily find at home.
PRO TIP: Don’t be afraid to use sparkly elements like glitter pens and gold washi tape to add some oomph to your designs!
Materials used:
- A page from ColorIt’s A Colorful Christmas coloring book
- ColorIt White Premium Paper
- ColorIt gel pens, glitter pens, and markers
- Colored decorative paper
- Gold washi tape
- Sponge
- Glue
- Scissors
How To Make:
- Choose a page from ColorIt’s A Colorful Christmas book. It’s best if you pick a page with small, separate elements. If you haven’t colored one yet, it’s fine! For a holiday-themed card, gel and glitter pens are a real winner, as they give the illustrations some sparkle and shine.
- Carefully cut out the illustrations and set them aside.
- Take your special decorative paper and fold it down the middle. Make sure it’s nice and thick as this will serve as your card.
- Now it’s time to design! Take your cutouts and plan their arrangement on the cover. Don’t be afraid to mix and match!
- Once you’ve decided on their placement, take your sponge and cut them into small squares. These will serve as the mounts for your cutouts. Their purpose is to give your cutouts a nice 3D effect. Play around with depth and cut the sponge into different sizes.
- Glue the sponge squares on the back of your cutout illustrations. Once done, glue the illustrations onto your card.
- Add a nice greeting on top. We used the gel pens to write ‘Happy Holidays’. For a tutorial on lettering and modern calligraphy, check out this video.
- Embellish the edges of your card with glitter washi tape.
- On the inner side of the card, glue on ColorIt’s White Premium Paper. Feel free to add any embellishments and cutouts on the border to make it prettier. Now you’re ready to write a nice holiday message to your friends or loved ones!
A Very Sweet Valentine’s Day Card

The special people in your life deserve a special Valentine’s Day card. This pink beauty is full of hearts and flowers that are sure to brighten up anyone’s day.
Here’s how to make it:
Materials used:
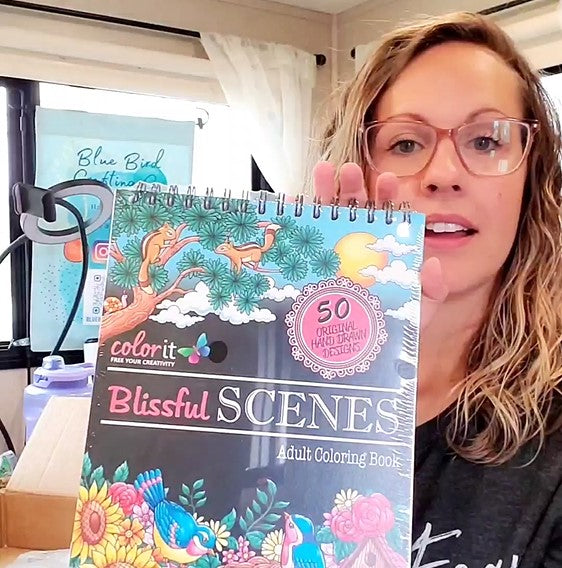
- A page from ColorIt’s Blissful Scenes coloring book
- ColorIt White Premium Paper
- ColorIt gel pens, glitter pens, watercolor brush pens and markers
- Special scented craft/decorative paper (pink)
- Washi tape
- Glitter hearts
- Felt
- Glue
- Scissors
How To Make:
- Pick a page you’ve colored from ColorIt’s Blissful Scenes coloring book. For our card, we chose this sweet heart-shaped design, complete with flowers and little songbirds.
- Cut the design out and set it aside.
- Glue your cutout illustration onto the special scented craft paper, making sure that the middle of the heart aligns with the middle of the card, too. Fold the card in half.
- Now let’s design the inner portion of the card. Take ColorIt’s premium white paper and cut it in half. Take one piece and write a “Happy Valentine’s Day” greeting with a gel or brush pen. Glue this piece on the left-hand side of the card.
- Apply some glue around the lettering and sprinkle some glitter hearts. Wait for it to dry.
- Glue the other piece of white paper on the right-hand side and embellish its edges with bronze or copper glitter washi tape.
- Add other designs like felt hearts and ribbons!
- Now you’re ready to write a Valentine’s Day letter to your friends or special someone!
Elegant and Feminine Thank You Card

A short but sweet message of gratitude can go a long way. Express your thanks through a creative card like this!
Materials used:
- A page from ColorIt’s Colors of Nature coloring book
- ColorIt White Premium Paper
- ColorIt gel pens, glitter pens, watercolor brush pens and markers
- Decorative paper
- Glue
- Scissors
How To Make:
- Color a couple of pages from the Colors of Nature coloring book. For this card, we used a page with a beautiful butterfly design and another page with some gorgeous blooms.
- Carefully cut the drawings and set them aside. For the flowers, you may have to use a cutter or an X-Acto knife.
- Take a nice, thick decorative or craft paper and fold it in half. This will serve as your card.
- Glue the flower cutout to the front cover of your card.
- Take your butterfly cutouts and fold them down the middle, so they appear to be “fluttering”. Plan their arrangement and then glue them onto the cover of the card, too.
- For the inside of the card, simply glue on ColorIt’s white premium paper onto one side. Keep it simple and understated.
- Now you’re ready to express your heartfelt gratitude!
Festive Congratulations Card

Congratulate people with a well-deserved pat on the back and a festive card like this! All it takes is a pretty mandala and some basic paper crafting skills. Here’s how to make it!
You Will Need:
- A page from ColorIt’s Colorful Mandalas coloring book
- ColorIt White Premium Paper
- ColorIt gel pens, glitter pens, watercolor brush pens and markers
- Specialty paper
- Washi tape
- Glue
- Scissors
How To Make:
- Color one of the many mandalas found in the Colorful Mandalas coloring book. For this design, we chose a vibrant color palette with greens, yellows, and oranges using ColorIt’s watercolor brush pens.
- Carefully cut the design out and set it aside.
- Take a nice and thick decorative paper and fold it in half. This will serve as your card.
- On the outer portion of the card, create a glittery border with some washi tape.
- Take your mandala cut out and further cut it into quarters. Now you have four equal parts of the mandala. Glue them on the corners of your card.
- For the inner portion, simply glue on ColorIt white paper on both sides. Make a border with some washi tape and you’re done!
Bonus: Colorful Birthday Card

This design doesn’t use coloring pages, but it’s so pretty that we just had to have it on this list. This is perhaps the simplest card to make out of this bunch--- and likely the most colorful, too! Wish someone a happy birthday with beautiful balloons and a message that will blow them away.
You Will Need:
- ColorIt Watercolor Brush Pen set
- ColorIt Watercolor Paper
- String
- Scissors
- Glue
How To Make:
- First things first: we have to make a color wash. Take your ColorIt watercolor paper pad and brush pens and use them to create a gorgeous color wash. For this card, we mostly used soft, pastel colors, but you can use any colors you like! For a full tutorial on watercolor washes, check out this video.
- Set your wash aside and allow to dry.
- Once dry, cut the sheet into little round shapes that resemble balloons. Arrange and plan their placements carefully before gluing them onto the cover.
- Attach a string at the very end of the balloon bunch. That’s pretty much it!
- You’re now ready to wish someone a very happy and colorful birthday!
Final Thoughts
Breathing new life to your coloring pages is as easy as whipping out a few supplies and sprinkling a bit of creativity. Making handmade greeting cards is one of the best ways to jump into crafts!
Through this project, you’re not only spreading love and positivity to the people you care about, but you’re also reaping a lot of benefits.
So what are you waiting for? If you want to send a heartfelt message, skip the text, email or even the dime-a-dozen greeting cards from the store and go for a handmade greeting card. There’s one for every occasion!
Which of these cards do you want to try first? Let us know in the comments below!
Share this post
- 3 comments
- Tags: adult coloring, adult coloring books, coloring tips, crafting, crafts, DIY greeting cards, scrapbooking
3 comments


I just came upon this. Looks very interesting. Being locked up in the house for so long is definitely not fun. And I am looking for some fun. I think I found some fun right here. I will just have to work on this. I have learned so very much since my Niece introduced me to Colorit pages. I am 85 and enjoying this element in my life. Thank you for all that you give to us out here. It is so much appreciated. Stay well and stay safe. Donna Stark
I think I’m going to try the Valentine card.
You can also take the colorit downloads and shrink them to 4×5 and print 4 to a page and have 4 card fronts (after you color those you have printed). I have done that with the Christmas downloads and have received lots of praise on them. so thank you colorit. My relatives and friends thank you for my cards. Did it also with the lighthouse download and now doing with the Christmas train which will be next years Christmas cards.